
Looking for Help?
Find answers to your questions
- Battery Safety Features - UL Certification
- Vehicle racks available for Voltbike
- Are you participating in the BC Electric Bike rebate program?
- At 6’ 2”, which City/Road bike is my best fit?
- Can I change my order?
- Can I pick-up my bike? (Canadian customers)
- Can I test ride your bikes at your Port Coquitlam, BC location?
- Do I need a special license or registration?
- Do you charge the battery on the bike or out of the bike and what is the voltage
- Do you ship your bikes fully assembled?
- Helmet sizing chart
- How do Test Rides work?
- How does Support work?
- How does VoltBike replace parts/offer support?
- How much does it cost to charge VoltBike?
- I already have a helmet. Is it possible to put the value towards another item?
- I am 5 foot 3 inches tall and I am looking for an off road e-bike. Which model would you suggest?
- I am 5'1" tall. Which bike would be best? Or are they all too big?
- Is the bike water resistant enough to operate safely in wet (rain and puddles) conditions?
- Pedelec and Power on Demand e-bikes
- Shipping Canada
- Shipping USA
- What is the interest rate for the Affirm financing option?
- What is the sales tax for American buyers?
- What is your return policy?
- What makes VoltBike better than the rest?
- Where is VoltBike located?
- Why are your prices so low?
- Why isn't my transaction going through?
- What type of hitch bicycle rack would you recommend for my new fat bike from VoltBike?
- Can I customize my bike order? Can I add or remove parts?
- How do I set the clock on the my display?
- 800S Button Pad Repair Guide
- How to Service & Lubricate the SR Suntour XCM30 Front Fork
- Rear Basket Installation Guide
- Measuring the Bottom Bracket and Spindle
- VoltBike Preventative Maintenance Tips
- Quick Steps to Adjust Seat Tilt and Position
- Brake Sensor Cable Reset (Error 05E) or Replacement
- How to Upgrade Your Pre-2019 Voltbike Hub Motor to a New Electrical System
- Color Display Screen Not Powering Up
- Tube and Tire Service for Rear Motor Wheels
- Why we add throttle delay of 6-8km/h on a Mid-Drive Voltbike models?
- Battery LED replacement
- V2 Key Lock - Service and Install
- How can I prevent my Voltbike tires to get puncture?
- Axle Mount Pedal Assist sensor Installation & Service
- How can I maintain my external magnet cadence sensor?
- Internal controller installation
- How to fix Hydraulic disc brakes front/rear Tektro Auriga HD-E500
- How good is the Fat Tire on my bike?
- What is Torque Sensor?
- What is Cadence Sensor and how it works?
- How to Choose the Right Lock for my Bike
- What is the error code “01E” means?
- Could I damage my Voltbike battery if I don’t charge it for long term?
- What is Hibernation Mode means?
- Suspension Seatpost Owner's Manual
- Color LCD Display 860C: Setup and User Guide
- Kodiak kickstand plate mount
- Cable / Wire Harness installation
- External Controller Installation
- Mid-Drive: Speed Sensor Install and Troubleshooting
- Mid-Drive Bike Repair: M600 Motor Removal
- Rear Hub Motor Removal and Service of Planetary Gears
- Handlebar & Stem: Installation and Setup
- Starfire Twin Force Light Installation
- VoltBike Trio Wheel Removal
- Display clock is not functioning correctly
- 05E Brake sensor cable error reset or replacement (or 05H error code)
- Battery does not function or light up/ BMS Reset
- Can I change my order?
- Can I swap out the seat from another bike?
- Can I take my VoltBike on a plane?
- Can I wash my VoltBike?
- Can you overcharge the battery by leaving it charging too long?
- Degreasing brake rotors on VoltBike to eliminate noise when stopping
- Do you have spare keys? I lost mine.
- Do you keep a record of the serial numbers of the bikes you sell ?
- Does cold weather affect my Li-ion battery
- For my Voltbike, how can I reset the trip or odometer?
- Freewheel removal - over sized motor plug
- How do I install the external clamp mirror?
- How do I install the internal wedge mirror?
- How do I remove my LCD screen?
- How do I replace my battery LED panel?
- How do I replace my Key/Lock assembly?
- How do I replace the button cover cap for my LCD screen?
- How do I turn the lights on?
- How does Support work?
- How does the twist hand throttle work and what does the red button have to do with it?
- How does VoltBike replace parts/offer support?
- How should these batteries be stored long-term?
- How to adjust mechanical disc brakes on your VoltBike
- How to adjust rear derailleur on your VoltBike
- How to fix motor which does not measure speed or odometer does not work
- How to replace brake pads on Yukon 750
- Hydraulic lever position - set screw adjustment
- I have lost ONLY 1 of my battery keys. Could someone cut me a spare?
- I recently purchased a second hand VoltBike through a private sale. Is warranty transferrable?
- Is the VoltBike warranty transferable?
- LCD screen and keypad replacement
- LCD screen settings (Black and White)
- Lock-Out Top Cap Fix for Suntour Suspension Forks
- Owner's Manuals
- Pedal installation on your new VoltBike
- Replacing nylon gears on a Bafang hub motor
- The lock-out on my Suntour fork is not working. How do I fix it?
- What diameter is the seat post on the Mariner V2?
- What is pedal assist?
- What is the air pressure setting in the rear shocks on the Outback and Enduro
- What is the crankarm specification for the 2018/2019 VoltBike Yukon and Bravo
- What is the red button on the right side of handlebar ?
- Where can I get replacement tires for my electric fat tire bike?
- Where is the serial number on my Trio e-trike?
- Where is the serial number on my VoltBike?
- Wiring Schematics
- Can I customize my bike order? Can I add or remove parts?
- How good is the Fat Tire on my bike?
- External Controller Installation
- Rear Hub Motor Removal and Service of Planetary Gears
- Handlebar & Stem: Installation and Setup
- How do i put my mirror on my VoltBike?
- 05E Brake sensor cable error reset or replacement (or 05H error code)
- Battery does not function or light up/ BMS Reset
- Brake lever power cut inhibitor malfunction
- Creaking sound from headset
- Degreasing brake rotors on VoltBike to eliminate noise when stopping
- Freewheel removal - over sized motor plug
- How to replace brake pads on Yukon 750
- Hydraulic lever position - set screw adjustment
- Installing a replacement controller on VoltBike Yukon 2017 and previous models
- Installing a replacement controller on VoltBike Yukon 2018/2019 models
- LCD screen and keypad replacement
- Replacing brake sensor (power cut off inhibitor) on Tektro hydraulic brakes
- What is the crankarm specification for the 2018/2019 VoltBike Yukon and Bravo
- Wiring schematic for Yukon 750 (2017 edition)
800S Button Pad Repair Guide
Table of Contents
800S Button Pad Repair Guide
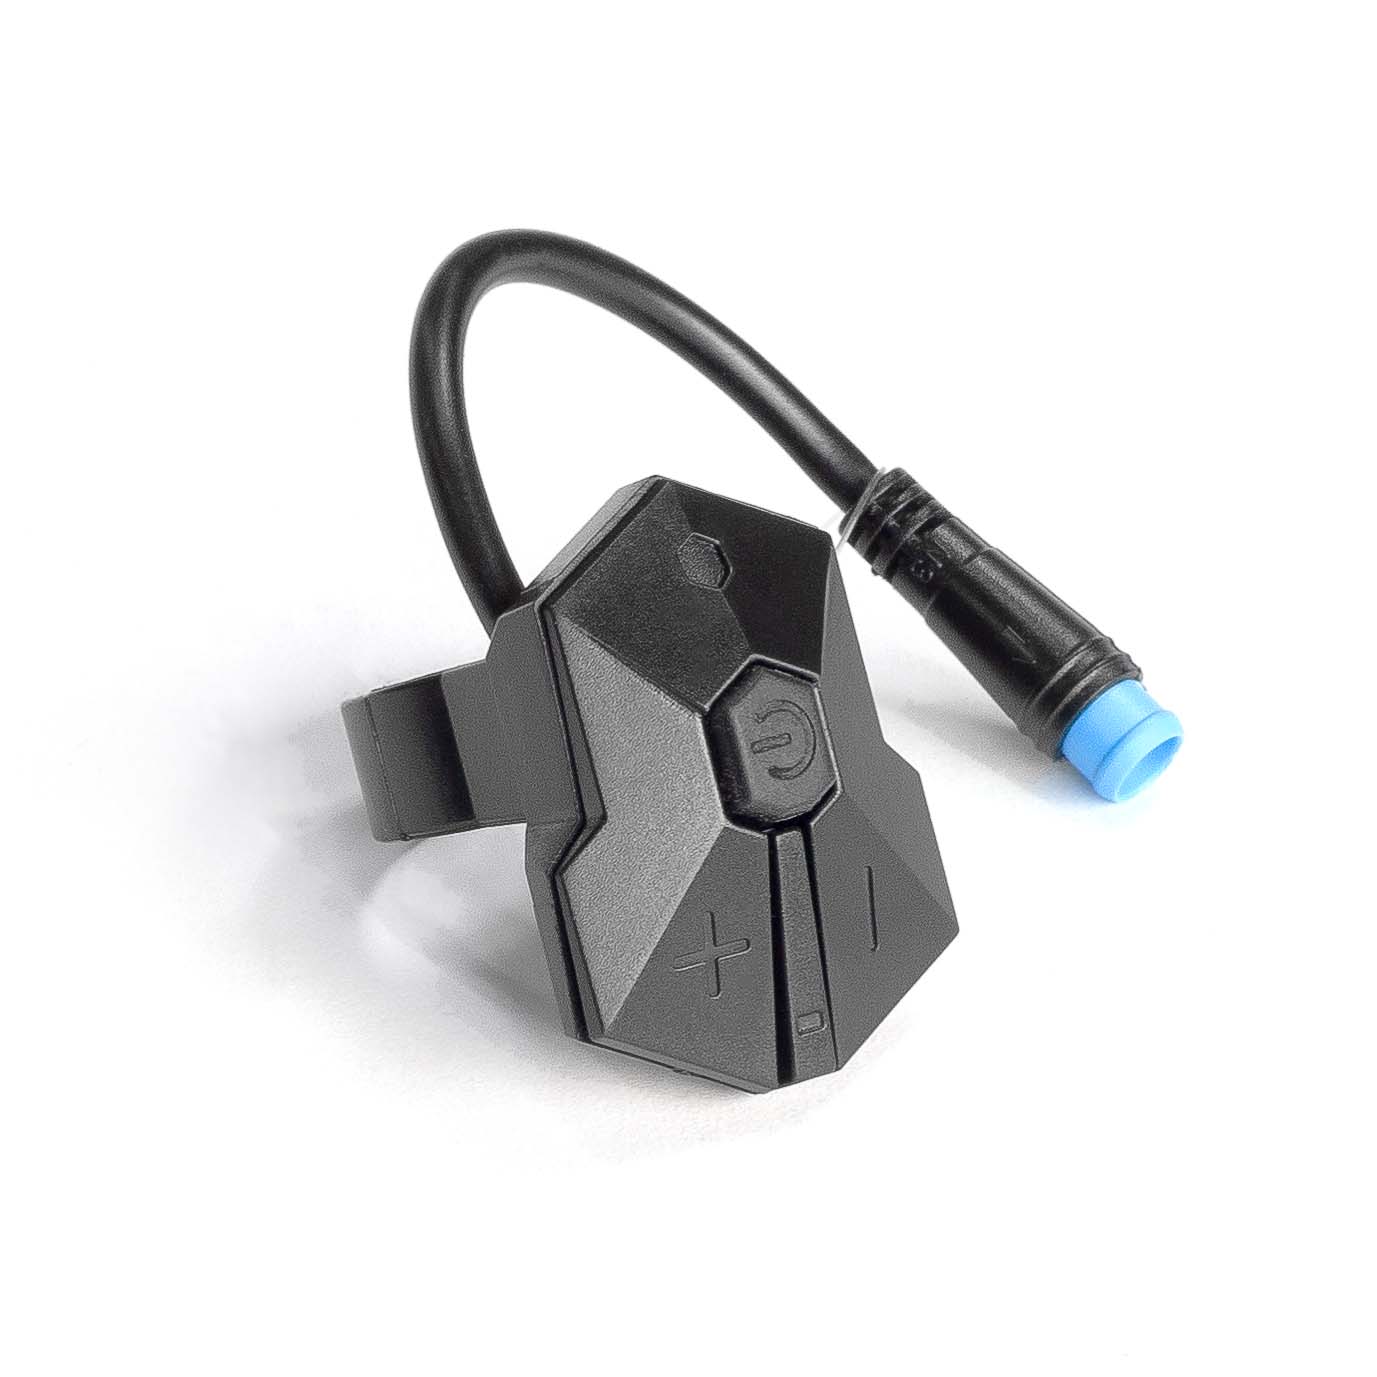
Since the 800S screen is hard-wired to your VoltBike, replacing this display with a newer model (so long as your screen's plug-end is green) is always a great option. Our bikes last a long time though, and it's great to have the option to fix this component.
Fortunately, you can use an 850C button pad replacement to repair the physical exterior components without having to rewire the whole system.
Note: This repair only fixes a worn-out top plastic piece and the rubber pad beneath it. The underlying electronic button must still be functioning when pressed for this fix to work.
Tools & Parts Needed
-
Small precision screwdriver
-
850C button pad replacement part
Step-by-Step Repair Instructions
-
Step 1: Locate the small screws on the back of the button pad housing.
-
Step 2: Carefully remove these screws to open and disassemble the button pad unit.
-
Step 3: Remove the old, damaged top plastic piece and rubber pad.
-
Step 4: Place the new plastic piece and rubber pad from the 850C replacement part into your existing housing.
-
Step 5: Reassemble the casing and secure it tightly with the rear screws.
Service & Support Options
Most of our riders handle these fixes themselves or partner with a local bike shop. If you are outside our service area, you can check out the Local Service link at the bottom of our main website (voltbike.com) to find a trusted shop nearby that works on our bikes. You are also always welcome to visit one of our physical locations for assistance.
Updated on 24 Aug 2026
What are your Feelings?
Thanks for your feedback
- Choosing a selection results in a full page refresh.
- Opens in a new window.